Whistler Outerwear, Lifestyle Clothing & Adventure Gear

/
/

Drying off is not something many of us give much thought to. It’s just something you do, but a group of individuals saw an opening in the market for a product that would serve as much more than just an afterthought.  Slowtide beach towels came to be in 2015, when Kyle Spencer, Dario Phillips & Wylie Von Tempsky of California, saw that towels were uninspiring and mundane. Their first attempt yielded a functional, new medium for art on a premium 100% cotton towel, and so Slowtide towels came to be.

Functionality

All of the Slowtide products meet the strict guidelines set by the The STANDARD 100 by OEKOTEX® . This is a worldwide consistent, independent testing and certification system for raw, semi-finished, and finished textile products. Having this certification means that consumers can have peace of mind that their product is free of harmful chemicals. In addition to this certification, Slowtide features products that are made with 100% super soft & absorbent cotton as well as velour. Some of their travel products are even made with 100% recycled materials. The materials are all selected for their feel as well as absorbancy.

Art

Slowtide towels are not just towels. They’re art. The brainchild of three friends that saw an opportunity for a new medium. The prints seen on the towels are created by tie-dye, mixed paints, manipulated pixels, and so much more. It’s also not unusual for collaborations with artists and photographers to occur and the results are woven, tactile, travel-able artwork. Some of the collaborations are also forms of giving back and proceeds from the sales are donated to charitable organizations.

So next time you’re drying off, think of Slowtide. This brand has taken an object that is often overlooked and changed it into artwork, transforming it entirely. And they didn’t stop there. Their goal is to make the daily ritual of drying off an art form too.

/
/

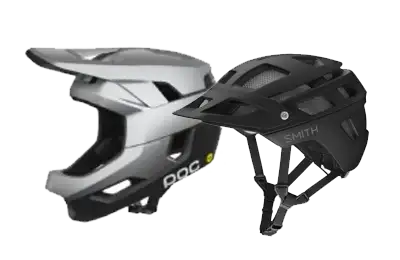
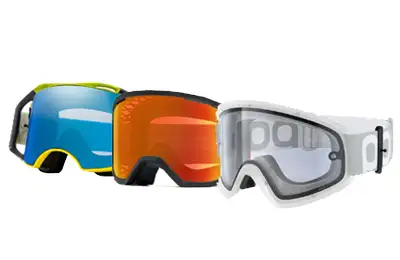
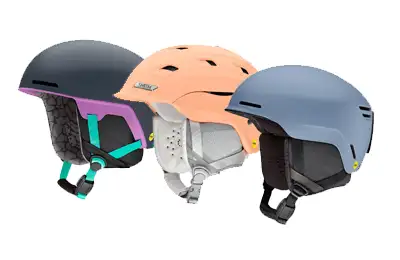
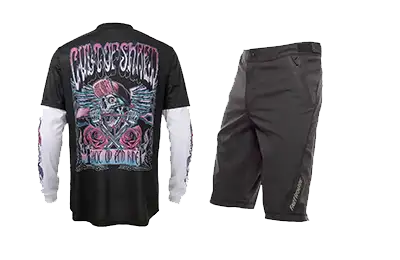
Here at McCoo’s, we look to offer the best gear for all your Whistler adventures. What makes it the best is extensive research into what is needed to perform and play at all levels. We look for gear that lasts, performs in all conditions and of course, is safe. With all things considered, POC cycling helmets and apparel fit what we look to offer to our customers.

POC is a Swedish company on a mission to produce helmets and apparel that save lives and can reduce the consequences of accidents for gravity sports athletes and cyclists. The company was founded in 2005 and initially, they broke into the ski racing market. POC’s new ideas and solutions to improve alpine safety, by reducing the force transmitted to the brain and body in case of a crash, gained a lot of attention. The need for such products quickly transferred into another industry: cycling. This led to the evolution and development of protection for different categories with each sport including freeskiing, snowboarding and mountain bike disciplines. Consequently, POC has become a highly desired brand by athletes and enthusiasts alike of both sports.

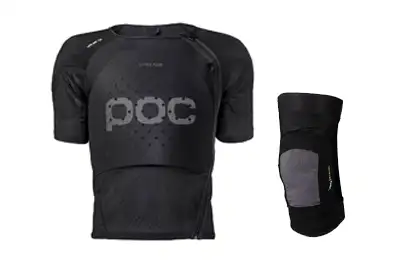
The concepts, technologies, and materials used and implemented by POC for the helmets and body armor are highly researched in the state of the art POC Lab. Throughout the research process and during testing, the equipment is scrutinized by POC’s scientific forum that consists of some of the world’s foremost sports medicine experts, brain scientists, and specialists in spinal cord injuries. As result, the products created by POC are scientifically proved to help reduce the severity of injuries in action sports.

In addition to protecting the user and decreasing the undesired results of crashing, POC has set themselves apart with their designs. Eye-catching colors and progressive structures have made their products distinguishable from competitors. What’s more, the aesthetics are an addition to a high-level of comfort. Vents and padding have been put in the perfect places so that users can focus on the task at hand and not their gear.

We hope you enjoyed this gear feature. As always, if you have more questions regarding the best gear for you and your sport, stop by McCoo’s. We’d be stoked to lend our expertise. Stay tuned for more gear features!

/
/

It’s adventure season! And with that comes hiking, biking, road trips, and of course, camping. While it can be a little chilly during the springtime, it’s nothing that a blazing campfire can’t solve. Choosing where to get your camp on for the first time this year can depend on a number of factors; The snow line and campground opening dates are just to name a few. Luckily, we’ve got the intel on epic spring camp spots located right outside Whistler.

Cal-Cheak

This recreation site lies just south of town. Due to its location, it’s one of the first areas to be free of snow. The campground officially opens on May 1st, or when it’s snow-free. Campsites are on a first come, first served basis, no reservation system exists. It’s heavily treed which means it can get cold, so pack layers! Firewood is for sale from the Site Operator when a campfire ban is not in place.

Fun Activity To Do While There: Hike

Wedge Mountain

Situated north of Whistler, right past Green Lake, there is another recreation site. At the base of Wedge Mountain, lining the river lies some informal campsites. The river is stunning and it’s rushing waters give the illusion that you’re deep in the forest. Be careful not to park your tent to close, the waters can change with the weather.

Fun Activity To Do While There: Bike

Lillooet Lake

A short drive from Whistler lies Lillooet Lake. It’s often free of snow early in the year. This is a popular recreation area as noted by the several inexpensive campgrounds that line the shore. The sandy beaches that are found at the Twin Lakes and Strawberry Point sites are a big hit with many of the locals. But don’t be fooled by the inviting clear blue waters- it’s actually really cold!

Fun Activity To Do While There: Fish

Callaghan Lake

This campground is often one of the last to be free of snow but if the temperatures are warm, you can expect for it to be open much earlier than normal. The area to camp hugs the stunning and picturesque Callaghan Lake. It’s dark surroundings, free from light pollution make this spot prime for when a solar storm is occurring and the Northern Lights are visible.

Fun Activity To Do While There: Stargaze

Grab your portable stereo, action cam, and something to bundle up in for when the sun goes down and get camping!

/
/

Spring is in the air. With the warmer weather comes an increase in activity and that means more sweat, more dirt, and more frequent cleanings. The frequent cleaning should be in place to keep germs, mildew, and other gross stuff under control. Not mention, prevent your gear smelling like a locker room. What’s more, not cleaning your equiptment regularly can actually decrease its performance.  Even if you’re regularly cleaning your gear, and you should be doing that, here’s a quick guide to making sure you’re keeping your equipment clean the right way.

Head Phones/ Ear Buds

Dip a Q-tip in rubbing alcohol and wipe it across the speakers of your earbuds. This works best for in-earbud that can gather wax as they nestle in your ear canal. The rubbing alcohol should take the wax right out, making your music instantly sound more clear. You only need to do this if you notice gunk buildup, or if the audio is noticeably quieter in one bud.

Backpack

Backpacks collect so much more than what you put inside them. First vacuum out dirt and debris. Then, add a delicate detergent to warm water and use a sponge or cloth to wipe the pack down. Some pack manufacturers also recommending avoiding hot water or spot removers, as these can damage the fabric. As you clean your pack, examine the zippers, which can fail if they’re jammed with dirt and debris. You can vacuum out the dirt, or scrub zippers with a soft nylon brush (like a toothbrush) and cold water. After you wash the bag, don’t put it in the dryer. A good way to dry your pack is to stuff it with newspapers and hang it in the shade.

Water Bottle

Hopefully, you’re not waiting until spring to clean your water bottle but just in case…pick your cleaning solution and get it ready. White vinegar is probably best for the job because it’s an excellent stain remover. Dilute 1-2 tablespoons of the vinegar with a cup of water. Pour the solution into your water bottle and let it sit for 15 minutes and then rinse. Voila!

Sunglasses

Forget using your breath to remove streaks and residue. Rinse your sunglasses under warm water- not too hot, not too cold. Use a mild dishwashing soap to wash all over your frames, working it in with your fingers. If necessary, use a microfiber cloth to dislodge heavier grime. Concentrate on areas that are heavily exposed to your skin – the nose bridge and the ends of your stems. A soft-bristled toothbrush is ideal for cracks and crannies, especially the groove where the lens sits, as build-up is prone to occur there. Rinse off all the soap, dirt, and dust. Watch it swish satisfactorily down the drain. Dry your sunglasses thoroughly using a microfiber or lint-free cloth. If you use a towel, you may end up with lenses covered in towel fuzz.

Clean your gear to prolong its lifespan and also to stay fresh while adventuring. If you have any questions about how to clean any of your other gear, don’t ask Mom, ask McCoo’s.

/
/

Après goes hand in hand with ski season but there really is something special about enjoying a pint in the spring sun after a day on the hill.  Connecting with your buds and reliving the best moments of your ski day are all part of the mountain experience. And so is ending up dancing in your ski boots at 2am. So get ready to laugh, let loose a little and après like a boss with these tips!

Pick Your Poison

Pick what you’re drinking and stick with it.  Drinking from the early afternoon into wee hours of the following morning leave a lot of room for options but those options might make you miss a day of skiing. Also, stay away from the shot ski…no one ever regrets that the next day!

Eating Is Definitely Not Cheating

Fun fact: Skiing is hard work and burns a ton of calories. Replacing those calories is crucial in order for you to hit the slopes hard again the next day. And, it also enables you to party well into the evening. Grab a quick bite to eat on your way to the bar or even order a round of world-famous nachos while hanging on the patio.

Don’t Forget To Sleep

If there’s snow in the forecast, it warrants skipping the night out to get a good sleep so you’re ready for the first chair. Après is an awesome tradition, but fresh tracks and face shots will always take priority. Even if there’s no new snow, starting to après right after a day on the hill means it’s okay to call the night early. That’s the secret to being able to do it day in and day out.

Alternate Drinks With Water

Beer, water, beer, water. If you want to feel good the next day and make it back on to the hill, hydrate like you’ve never hydrated before. Sure, you might be hitting the washroom more often but when everyone else is complaining of a hangover and you’re not…it will be worth those few extra trips.

Dress For Success

Nail the après-ski style. And no, that doesn’t mean wheeling out your best cashmere, cat-eye sunglasses and colourful faux fur. It means being able to comfortably transition from being on the mountain to being in a bar. Try layering peices like a plaid shirt and a tee. Also, don’t forget a hat to cover up that helmet hair. To gain more insight into the world of après-ski style, stop by McCoo’s for some real advice.

/
/

Since skiing powder becomes a bit harder as spring progresses, it’s a great time to work on your steeze in the terrain park. But if you’ve neglected this part of the mountain all season long, it can be intimidating and downright dangerous to just drop in. The terrain park is an outdoor recreation area containing terrain that allows skiers and snowboarders to progress at performing tricks. The keyword is “progress”. Here are a few tips on navigating the terrain park that will have you pulling tricks out of the bag that you didn’t know you had.

Start In The Beginner Terrain Park

Most mountains have multiple terrain parks, each with different features geared to different ability levels. Depending on your current skillset, it can be either terrifying or tempting to hit the largest jumps you see. To begin with, it’s useful to identify if it is a beginner or expert park, how big the jumps are, and how big the other people in the park are going. This is both for your safety and the safety of others around you. What’s more, starting small lets you develop the basics you’ll need to advance.

Check Everything Out

Real talk: If you’re reading this blog, chances are you shouldn’t be sending features blind. Take the time to do a ride through lap and familiarize yourself with the features you will be attempting.

Learn Park Etiquette

There are a few pretty simple rules you should generally follow with regards to other riders in the park.

Don’t get in the way of park features

This means don’t sit or stand in the run-in, take-off, or landing of any park feature. Always try to keep these areas clear and when you hit any park feature you should try to avoid stopping in any of these areas. If you need to stop, always do it away from park features where you won’t get in the way of other riders.

Don’t follow too close to other riders

You aren’t a mind reader. Give space to the rider ahead of you in the park.

Don’t cut people off, but also don’t hold up line ups

Wait your turn but be aware when it is your time to drop in.

Try not to brake on the landings

Bails and crashes happen, that’s fine. However, try to avoid braking while still in the landing area of any park feature. It damages the features.

Grab A Lesson

It can be challenging learning tricks on your own. For expert instruction, Whistler Blackcomb run park-specific lessons.

Remember, everyone has to start somewhere, so don’t feel intimidated by better riders in the terrain park. It can help to look the part. Come stop by McCoo’s for all the latest gear trends.

/
/

The cold. Most of our winter gear is designed to combat its effects. Gortex, layers, breathability. These terms might sound familiar and don’t get us wrong, they do work. Despite the technologies improving drastically, there still stands a chance of the sub-arctic temps winning and leaving you out in the cold…no pun intended. Presently, there are a number of brands that have lead the way in creating clothing that keeps you warm no matter what conditions are on the outside. They rely on generating heat from an external source, most of them powered. We’ve got the low down on some of the current heated clothing technologies now available at McCoo’s.

Flexwarm Jackets

Flexwarm has spent over the last five years researching and developing patented new technologies that have enabled them to create a completely unique, flexible heating element that is so thin (0.5mm) it can be printed directly onto fabric. Because Flexwarm can be printed, it can then be layered directly onto fabric which enables 8K Heated Apparel to be ultra-lightweight, durable and washable (without the need for adding additional heavy and bulky insulation materials). You can expect upwards of 13 hours of heat from your jacket and when it’s out, just recharge the battery. To adjust the temperature, connect your phone to your jacket via Bluetooth and input your desired level of toastiness! And finally, topping it all off, these jackets are splash resistant, so you don’t have to worry if mother nature decides to change her mind from snow to rain.

Therm-ic Socks

Therm-ic have designed high-end socks that can offer up to 29 hours of heat. The heat is generated from an easily rechargeable battery that sits at top of the sock. The technology allows for even distribution of heat, easy attachment of batteries to the sock, and optimized integration of the heating elements for a guaranteed long life. What’s more, Therm-ic products connect to your smartphone! With the batteries’ Bluetooth function and the Thermic mobile app, you can adjust the heat setting for your sock at the touch of a screen. Now, that’s going to come in handy for turning it up a notch while on the chair lift.

Staying warm while on the hill no longer has to be a battle. With heated clothing technologies advancing, it can be easy to set a temperature and stay there, no matter what the weather is doing. If you have any questions regarding the heated gear currently on the market, come stop by McCoo’s– guarenteed a few of our staff members are probably wearing them right then and there!

/
/

Skiing and snowboarding can be full of hazards. You have your airtime, trees, cliffs, and of course, other mountain revelers. While many of us don’t spend a lot of time thinking about how to protect ourselves from these risks, it should be more than food for thought. Head and facial injuries are just some of the consequences of not wearing the proper equipment when on the hill. Even if you consider yourself a conservative rider, all skiers and riders can enjoy the benefits and warmth that a helmet provides. But where to start? Here are some tips for buying the right helmet.

Ski And Snowboard Helmet Components

Inner liner: This is typically made from EPS (expanded polystyrene) foam, the material that looks like Styrofoam®. It’s designed to absorb impact. A helmet is considered no good after a direct blow to it.

Shell: The shell, or outer layer of the helmet, is a rigid surface (typically high-impact plastic) that can help protect the head against sharp objects, knocks, and abrasions. It also helps spread impact energy over a larger portion of the helmet during a fall.

Certification: There’s a new buzzword in the helmet world, MIPS.  MIPS stands for Multi-directional Impact Protection System and it is the current gold standard for helmets.

Ski / Snowboard Helmet Sizing and Fit

Measuring for your size: You can find your correct size by measuring your using a tape measure or come on down to the store and have one of our staff help you. To do it yourself, position the tape measure just above the ears and about 1″ above your eyebrows. Measure around the largest part of your head to determine the circumference of your head. The measurement will help you select from extra small, small, medium and large helmets.

Checking the fit: A good helmet should feel snug but not tight. If the helmet can rock back and forth, the fit is too loose. Shake your head from side-to-side. If the helmet shifts, try a smaller size, adjust the sizing mechanism or use thicker sizing pads. Push up the front and back edges. If they move, tighten the straps.

The helmet should be positioned low enough in the front to protect your forehead. It should sit level with its front edge no more than 1″ above the eyebrows. Finally, check to make sure there are no gaps between your head and the helmet lining. If there ae gaps, pads can be used to decrease them.

Chinstrap/buckle: The chinstrap needs to fit comfortably against the throat to reduce the chance it will come off. The strap should fit snugly but loose enough for you to not feel choked. Make sure to always fasten the strap before riding.

Now that you have your helmet picked out, you can add extra features such as audio, camera mounts, and warmer liners. There’s really no excuse for not protecting yo’ head!

/
/

Foreigner must have been talking about feet in ski boots when they sang, “Your as cold as ice”. Cold Feet can be a real bummer, expecially when the low temps are creating all-time conditions. To prevent your toes from being the reason you have to call the day, try these tips!

Make sure your boots fit: Cold feet can be caused by poor fitting boots. Something could be cutting off your circulation or they could be too loose allowing for a bit too much air flow. Visit a boot fitter to determine if this is part of your problem.

Wear proper socks: Wear ski socks. Not just any socks will work, you want ones that are made of wool or other materials that will prevent sweating and blisters from rubbing.

Keep your boots dry and warm: If you store your boots in the car overnight, they’re going to be cold when you put them on in the morning. Take the extra time to bring them inside. Also, dry your boots out from one use to the next. Sweat can make the liners damp, and once again, a damp boot is a cold boot. Use either a boot drier or remove the liners to dry after a day on the hill.

Keep your feet dry, too: Keep your feet free of sweat. Again, this goes back to the socks you’re wearing and if you’re properly drying your boots. Dry feet are warmer feet.

Heat your feet:  Disposable foot warmers are easy to stick to your socks or the interior of your boot and can create a toasty environment for your tootsies.

Replace the liners: Some boot liners just aren’t that warm. You can replace yours with a custom moldable liner.

Ski more: Cold? Ski harder! The harder you ski, the warmer your core will be and this means more blood flow to your extremities AKA your hands and feet. So wear those extra layers and that warm jacket then ski until your heart’s content!

If you have more questions about keeping your feet warm while you’re on the slope, ask one of the knowledgeable staff at McCoo’s. They’ll help you gear up for adventure.


/
/

Whistler has received 191cms in the past 7 days.

Yes, you did read that right. That’s a lot of powder and for many, it spells ideal snow conditions. We’re talking waist deep, light, and fluffy pow pow just waiting for tracks to be laid into it. Now, as each day passes and the centimeters keep accumulating, you might be thinking, “I need a rest day!” So is there such thing as too much powder? As the ski legend, Doug Coombs would say, “there is never such thing as too much snow.” But in case you’re starting to feel the effects of being a full-time powder-hound, here are some tips to get through the heaviest of storms.

Eat Right

Snow sports require a lot of physical exertion and when you add in pushing through a meter of fresh snow, you’ve just increased your work load even further. To keep up with the demands placed on your body and recover afterward, nutrition is key. First step: A proper breakfast, lunch, dinner, and snacks that include all the food groups

Sleep Well

This is a hard concept to take in but here we go…Pow > après. You see, après will be there all time during the season but the elusive powder, it can come and go. So get it while it’s hot and get a good night sleep to be in optimal condition for shredding the duration that the mountain is open.

Hydrate

You can feel like a million bucks until a dehydration headaches set in. If you’re having difficulty staying hydrated while you’re riding, load up a backpack and drink on the lifts or make sure to drink a lot after a day on the hill.  Hydrate, hydrate, hydrate!

Stretch

If this is your third day in a row, your legs are going to be screaming as soon as you make a few turns. Combat the lactic acid and decrease your recovery time by performing a thorough stretch both before riding and after. Not only does stretching help you recover faster, but it can also help you decrease the risk of injuries.

Take Care Of Your Gear

Not only is your body taking a beating when you are riding every. single. day, but your gear is also maxing out its capabilities. No matter how tired you are, take the time to properly dry out your equipment. When you’re getting all the goods, your future self will be thanking your past self’s actions!

Powder days are the gold of skiing and you have to get out there while the getting’s good. Take care of yourself and your gear to make the most out of the best days of the season.