Skiing and snowboarding can be full of hazards. You have your airtime, trees, cliffs, and of course, other mountain revelers. While many of us don’t spend a lot of time thinking about how to protect ourselves from these risks, it should be more than food for thought. Head and facial injuries are just some of the consequences of not wearing the proper equipment when on the hill. Even if you consider yourself a conservative rider, all skiers and riders can enjoy the benefits and warmth that a helmet provides. But where to start? Here are some tips for buying the right helmet.
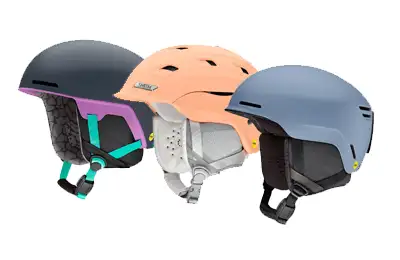
Ski And Snowboard Helmet Components
Inner liner: This is typically made from EPS (expanded polystyrene) foam, the material that looks like Styrofoam®. It’s designed to absorb impact. A helmet is considered no good after a direct blow to it.
Shell: The shell, or outer layer of the helmet, is a rigid surface (typically high-impact plastic) that can help protect the head against sharp objects, knocks, and abrasions. It also helps spread impact energy over a larger portion of the helmet during a fall.
Certification: There’s a new buzzword in the helmet world, MIPS. MIPS stands for Multi-directional Impact Protection System and it is the current gold standard for helmets.
Ski / Snowboard Helmet Sizing and Fit
Measuring for your size: You can find your correct size by measuring your using a tape measure or come on down to the store and have one of our staff help you. To do it yourself, position the tape measure just above the ears and about 1″ above your eyebrows. Measure around the largest part of your head to determine the circumference of your head. The measurement will help you select from extra small, small, medium and large helmets.
Checking the fit: A good helmet should feel snug but not tight. If the helmet can rock back and forth, the fit is too loose. Shake your head from side-to-side. If the helmet shifts, try a smaller size, adjust the sizing mechanism or use thicker sizing pads. Push up the front and back edges. If they move, tighten the straps.
The helmet should be positioned low enough in the front to protect your forehead. It should sit level with its front edge no more than 1″ above the eyebrows. Finally, check to make sure there are no gaps between your head and the helmet lining. If there ae gaps, pads can be used to decrease them.
Chinstrap/buckle: The chinstrap needs to fit comfortably against the throat to reduce the chance it will come off. The strap should fit snugly but loose enough for you to not feel choked. Make sure to always fasten the strap before riding.
Now that you have your helmet picked out, you can add extra features such as audio, camera mounts, and warmer liners. There’s really no excuse for not protecting yo’ head!